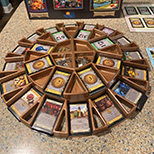
If you play Dominion, you know it can be a challenge to lay out the cards in a convenient way so that everyone can reach them. This carousel design solves that problem by allowing you to rotate the cards around to each player.
I didn't invent the idea, but I think I made it better. I designed this card carousel not only to be stylish with smooth edges and rounded corners, but to print faster and use less filament than other designs I've seen. With typical slicing settings,
15% infill and a 0.40mm nozzle, this design uses just under 1000g of filament, so pop in a fresh 1KG spool and print one out. The whole thing takes about 48 total printing hours on my Prusa Mk3S+ on 0.30mm draft settings.
The bottom section is about 21" in diameter and can hold 16 stacks of 1 inch high sleeved dominion cards. The top half holds 8 stacks and has 4 large wells and 8 smaller wells for tokens, chits or coins. It's not food safe, so don't fill them up with hummus.
I glued with up using this marine-grade Polyurethane adhesive. It's stronger than super-glue and it cures faster than Gorilla glue. It's a pretty good deal at about $10 a quart. Apply a thin film to both sides of the seam and clamp it for 45 minutes to an hour. After the glue cures, use a razor blade to scrape off any foamed up glue that comes out at the seams.
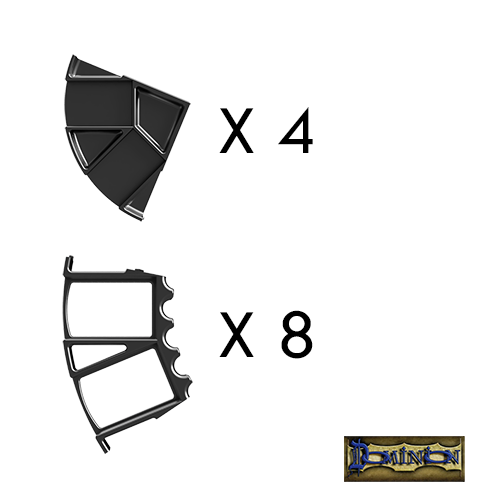
f you don't have a massive printer, download the segmented version, which is divided into 4 top pieces and 8 bottom pieces. Each individual piece can be printed on a Prusa Mk3S.
| Item | Download Link | ||||
|---|---|---|---|---|---|
 |
|
||||
 |
|
Build Instructions
The files are all designed to print without need for rafts or supports. Just orient them the right way up on the build plate and go. You may need to rotate about 20 degrees on Z to fit the parts on a Prusa build plate.Glue everything together. You can use super glue. But for a stronger bond, I used polyurethane marine adhesive. The parts are desgined to more or less self-align. Clamp them together while the glue cures.
For a prettier build, sand and fill afterwards and then spray paint. I used a high build spray paint from Rustoleum called Hammered Bronze that fills in a lot of little gaps and layer lines. It bonded well to my PETG.
Not Included
You will need a lazy susan base to place under the bottom section. The top section can just rest on top of the bottom section.When your friends ask you where you got that cool STL file, tell them about BrushTailGames.com!
License
The models on this page are released under the Creative Commons 4.0 Attribution-NonCommercial-NoDerivatives International License.I work very hard to make great models that you can use for free to improve your gameplay experience. Rather than charge you a few dollars for each model, I prefer to be paid in exposure. If you're happy with what you got for free, please check out Waddle Waddle and download the print and play to try it out.